Everthing You Need to Know About Sweda Food Dehydrator

Monday, March 30, 2009

Nesco American Harvest FD-61 Snackmaster Encore Dehydrator and Jerky Maker

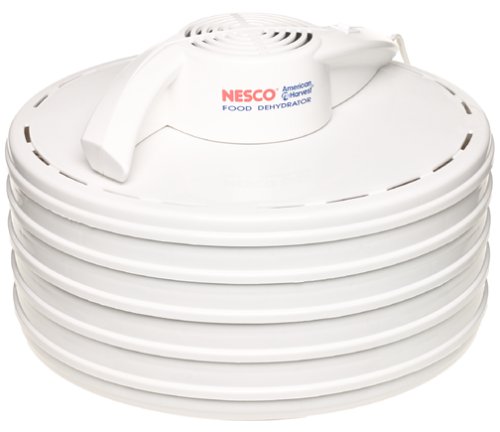
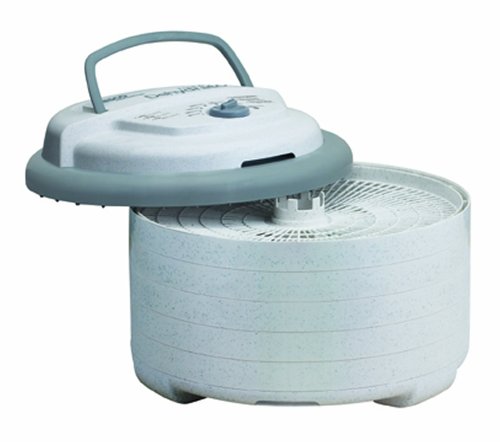
This convenient dehydrator makes great tasting, healthy snacks & jerky! Introducing the Snackmaster?? Encore???. It's Grey top and marbled design features 500 watts of drying power, and generates maximum speed and quality for dehydrating fruits, vegetables, beef jerky, and venison jerky. Helps dry food in hours, not days like ordinary food dehydrators. The top mounted fan eliminates the worry of liquids dripping into the the heating chamber!You can make delicious beef jerky, turkey jerky, fish jerky, trail mix, homemade yogurt, apple snacks, banana chips, dried soup mixes, dried tomatoes, watermelon, cantaloupe, honeydew, mangoes, papaya and other dried fruits at a fraction of the cost. Make dried herbs and spices; also make potpourri and dried flowers for any occasion.


There's nothing like a nice, ripe, delicious apple freshly picked from the tree, although the same might be said of garden fresh peas or a crisp, healthy carrot newly plucked from its earthen home.

But why, then, do we allow those apples to fall from the tree and rot upon the ground? Why do we go to the trouble of picking all of those great looking, red, ripe tomatoes only to allow them to slowly spoil as they sit in baskets and pails carefully placed in kitchen or pantry? The standard answer is "too much crop and too little time."

"When we can't even give them away to family and friends," we ask ourselves, "what else can we do?"

Food storage might be an answer to that. Unfortunately, it takes a long, long time to cut, peel and prepare fruits and vegetables for canning, freezing or dehydrating; and that can be time that we don't have.

The thing is, that time can be lessened. The old, wringer washers probably got clothes just as clean as do the new automatic washers, but who would willingly trade an automatic washer for those old, labor intensive machines even if those old appliances involved some initial cost savings? Similarly, cutting, dicing and peeling doesn't all have to be done by hand. There is a wide choice of tools and appliances to make those jobs much, much easier, and considerably quicker.

Pressure canners cut down on time, and are environmentally friendly. The right juicer, used when needed, can end the rotting of apples upon the ground. The combination of a good blender and the right food dehydrator can have you making your own fruit leather and other snacks. It may be just a matter of doing some checking, choosing appropriately, and investing wisely in order for you to "waste not" and "want not" without crashing into that wall of "too little time."

Even though you may have to open the pocketbook a little to get started, food storage really is a way of saving money by cutting down on grocery bills, and who would not want to do that in times of tight money and uncertain jobs? Food storage done wisely can also be much easier than what many envision.

The author of this article is the webmaster for http://www.storeitfoods.com, a site providing tools and tips for those interested in a home, food storage program.

dehydrator

Saturday, March 14, 2009

dehydrator

dehydrator

Drying or dehydrating vegetables is one of the oldest known methods of food preservation. The really great thing about it is that you can do it at home with equipment you have on hand.

You should pick your produce at it's peak and work as quickly as you can to preserve its colour and taste.

Prepare your vegetables as if you were going to serve them. Wash them well, trim, cut, chop, slice, whatever. Thickness will play an important role in how long your veggies take to dehydrate, so bear that in mind when preparing.

Next you must blanch the vegetables. This will preserve the colour and flavour of the vegetable. Most vegetables have an enzyme that, left active, is what makes it spoil so quickly. Blanching the vegetables stops the enzyme action.

Follow available guidelines for blanching (available at www.no-dig-vegetablegarden.com). Once blanched, chilled and drained, you are ready to dry or dehydrate your vegetables for long
term storage.

The Rules

Of course, there are heaps of rules...but let's start here.

There are three methods used to dry or dehydrate vegetables.
Sun dried, commercial dehydrator or oven.

Sun drying is the least reliable method for areas with variable temperatures. Unless you live in a climate that is a consistent 90F with low humidity for a guaranteed 3 days in a row, you risk your produce.

Once the drying starts, it cannot stop until finished. So DO NOT let your vegetables cool again until they're done. Having said that, lots of places do have that sort of weather...but more places don't, so sun drying is a bit of a gamble for most.

You can purchase food dehydraters in a range of sizes, but unless you are going to be doing an awful lot of this, it's probably better to wait or buy one with a group of friends to pass around. They aren't very expensive, but they are usually used for quite short periods of time.

So, we're left with the oven. It's almost certain that you have one, so nothing new to buy. It is time consuming and a little fiddly, but it's such a great result!

Oven drying

A home oven will only dry small quantities at a time (up to six pounds of produce, depending on the number of racks you have) so don't be preparing bushells of veggies at a time!

Set the oven at the lowest temperature and preheat to 140F (60C). If you are uncertain of the temperature, put a separate oven thermometer on a rack you can see. Check your temperature
every half hour or so.

Lay out your vegetables on stainless steel screen mesh or wooden
frames covered in cheescloth. Do NOT use cookie sheets as the
air must circulate around the food. Having the food sit next to
metal sheets may also transfer a metalic taste. Using other
types of metal materials may react with the food so please don't.

Load up the veggies. Doing trays of items similar in size will keep the drying even. For instance, doing pumpkin, carrot and
potato might be a good mix. Try not to mix strong flavoured items as the flavour may transfer from one vegetable to another.

Keep the oven door open about 3 inches or so during drying. It is vital that the temperature is maintained at 140F (60C) and that the moist air can escape. Move the trays around frequently to ensure even drying. No oven has even heat throughout.

Keep a close eye on your drying vegetables. Don't let them scorch and keep them moving.

Depending on the vegetable you are drying it will take between
4 and 12 hours to dry. Once they're done, the vegetable pieces
will be hard and should shatter if hit with an instrument.

Store in a water tight container. To use, just add them to soups and sauces as they are, or reconstitute (cover them in a container with water 2:1 ratio) for approximately 2 hours before using.

Judy Williams (http://www.no-dig-vegetablegarden.com) splits her time between being an executive and an earth mother goddess.

No Dig Vegetable Gardens represents a clean, green way to grow your own food. The site covers all aspects of growing, cooking and preserving your harvest.

dehydrator

Monday, March 9, 2009

Nesco American Harvest 5-Tray FD-35 425-Watt Snackmaster Dehydrator

This unit features Nesco/American Harvest's innovative Top Mounted Powerhead that dries food quickly and evenly with superior results. Detaches to make dehydrator dishwasher safe for easy clean up. Fan-Flow Technology means faster, more even drying with no tray rotation necessary. Perfect for the beginner.


In the fall time the herb growing season starts to wind down, but this doesn't mean the end of your herbs usefulness in the kitchen. Drying herbs in the autumn is a great way to extend their usefulness. Imagine setting around the table with your family on a cold winter night, with the smell of your favorite herbs steaming out from your favorite dish that you so lovingly prepared. Not only that but dried herbs look very appealing hang in in your kitchen or the pantry.

A herb that contains high moisture can be a bit more difficult to dry. Herbs such as bay, dill, thyme, marjoram, summer savory, sage, basil and oregano are just a few that lend themselves to drying.

Herb plants that are going to be harvested should be harvested in the early morning, in this way they have not extended much energy. Also if you can gather them just before they go into bloom they will be in their best condition for you to produce great dried herbs.

Increased flavor is obtained from the herbs if the leaves are dried whole, but when used they should be crumbled first before being added to your favorite dish . Herbs can be kept for a year or two, but for better results and increased flavor is recommended that they be used within six to 12 months. Your dried herbs should be stored in a airtight container placed in a cool dark dry place.

Herb drying can be carried out in a few different ways. These are a drying rack, hanging in warm well ventilated shady spot, microwaving, dehydrator and not really drying but freezing the herb leaves will preserve herbs also.

4 common methods a drying herbs

#1: Air drying
For small batches of herbs one should make sure first that they are rinsed off and all the water padded off. Pick off any of the wilted leaves and just leave the healthy looking ones. Next tie a bundle of herbs tightly around stems and insert into a brown paper bag. Make sure that this bag is large enough as to leave lots of room around the leaves of the plants. It is best practice to hang the herbs upside down as this allows the essential oils to flow into the leaves and increases the flavor greatly. You should hang them in a dark warm area with the temperature somewhere around 70 to 80F.

#2: Microwave drying
For people that don't have the patience or just want to get to their herbs dried quickly, the microwave offers a great solution. The disadvantage is that you can only do small batches at the time. The high-frequency waves produced by the microwave will cook the herbs from the inside to the outside. The drying process usually only takes two or three minutes in the microwave on a high setting.

#3: Oven drying
Oven drying is not a recommended way of drying herbs, as it evaporates the water and essential oils in the herbs to quickly, but for those that can't wait it will suffice. Herb roots can be successfully dried in the oven. Thick walled herbs such as basil and rosemary do well. It should only take a couple hours in the oven to produce your dried herbs.

#4: Dehydrator
The main advantage of using a dehydrator is that you can control the temperature and air circulation. This tends to produce a high quality dried herb. Another advantage of using a dehydrator is that you can dry large quantities of herbs and also herbs with high moisture without any problems.

So if you're looking to prolong your bounty that you have grown in your summer herb garden be sure to try drying your herbs for winter use.

Herbs can give you a sexy strong healthy body, so if that,s what you are looking for check this out!

http://www.herbgarden.rolltra.com

dehydrator

Thursday, March 5, 2009

Nesco American Harvest FD-75PR 700-Watt Food Dehydrator

The NESCO Professional Food & Jerky Dehydrator has more power than most dehydrators -- 700 watts -- which means faster drying time. You will have results in hours, not days. The top mounted fan with patented Converga-Flow action pressurizes air downward through the outer ring and horizontally across each individual tray, converging at the center, for fast, even drying. No need to rotate trays. The adjustable thermostat allows you to dry different foods at proper temperatures (95-155 F), providing the flexibility to produce the best drying results. As your needs grow, the Professional Food & Jerky Dehydrator can be expanded up to 12 trays.


A popular summer staple, the tomato is a fruit that is served as a vegetable. Few summer flavors can beat the taste of an excellent tomato on a salad or hamburger or in a sandwich. Tomatoes can come in red, yellow, green, purple, brown, and even striped verities.

The tomato plant is an herbaceous, sprawling plant that is part of the nightshade family. Close cousins of the plant include tobacco, chili peppers, potatoes, and eggplants. As the tomato is a part of the nightshade family, for many years people avoided eating the fruit. They avoided the fruit because a number of plants in the nightshade family are extremely poisonous. In the 20th century, this idea began to change in the United States.

The plant is native to Central America, southern North America, and South America. This gives the plant a native range spanning from Mexico to Argentina. To grow well, tomato plants require a minimum of 6 hours of sun a day.

The tomato was originally brought to Europe by Spanish explorers. The idea of eating the fruit did not take on quickly because of its association with nightshade. The tomato is a fruit in the botanical sense but lacks the dessert quality sweetness of other fruits. Because of this, it is more commonly prepared as a vegetable. The tomato is sweet but is accompanied by a bitter, acidic taste. When cooking the tomato, the heating process tempers the bitterness and allows the sweetness to come out in more flavor.

As the tomato tastes great on sandwiches, in salads, or sliced, it is a great summer food. The food is a good source vitamins A and C as well as a number of antioxidants. The lycopene found in the fruit is excellent for a person's heart making cooked tomatoes an excellent food if one is trying to be heart healthy.

When growing tomato plants, there are two broad categories, indeterminate and determinate. Determinate plants grow to a certain height and then stop. They then flower and produce all of their fruit within a relatively short time. This is a great type of plant to grow if trying to can tomatoes but isn't the best type if you want a summer of tomatoes to enjoy once a week, or so. Indeterminate plants grow, flower, and set their fruit over a longer period of time. They basically grow in stages. This is the best type of plant to get if the goal is to have a tomato a week.

For more information on tomatoes and popular recipes involving them, please visit http://cdkitchen.com.

Joseph Devine

dehydrator

Sunday, March 1, 2009

Nesco American Harvest FD-75PR 700-Watt Food Dehydrator

The NESCO Professional Food & Jerky Dehydrator has more power than most dehydrators -- 700 watts -- which means faster drying time. You will have results in hours, not days. The top mounted fan with patented Converga-Flow action pressurizes air downward through the outer ring and horizontally across each individual tray, converging at the center, for fast, even drying. No need to rotate trays. The adjustable thermostat allows you to dry different foods at proper temperatures (95-155 F), providing the flexibility to produce the best drying results. As your needs grow, the Professional Food & Jerky Dehydrator can be expanded up to 12 trays.


When Thanksgiving is over and all your company has gone home what do you do with all those turkey leftovers? Why not try freezing them. By freezing your turkey leftovers you will be able to enjoy fresh roasted turkey months from now when Thanksgiving and turkey leftovers are a thing of the past.

Freezing turkey leftovers is an easy and inexpensive way you can extend the life of your turkey leftovers by a few months. Turkey leftovers can be frozen up to three months with great results. Here are a few quick tips to make your freezing a success.

Freeze turkey in portions your family will use.

Slice, cube and chop the turkey meat for easy packaging.

Use zipper freezer bags for ease of storage.

Freeze turkey with stock and vegetables for making quick stew.

Stir fry turkey with vegetables and freeze then when ready to use thaw and serve over cooked rice.

Freeze pre-made turkey sandwiches, turkey quiche and turkey casseroles.

Frozen turkey sandwiches can be sent in lunches for work or school.

If you only have a small amount of turkey leftover, freeze in bite size pieces. Then the next time you have leftovers you can pull out the frozen turkey leftovers and add it to casseroles or pot pie.

Shauna Hanus is a gourmet cook who specializes in creating gourmet recipes. She has extensive experience cooking with easy to find grocery items to create delightful gourmet meals. She has put together a special Thanksgiving report that gives you 73 recipes to use with your leftover turkey as well as a special holiday ice cream cookbook that includes favorites like pumpkin pie ice cream and pecan pie ice cream. She has also put together a holiday planning guide to help you have the most enjoyable Thanksgiving ever. You can find all of these at http://www.turkey-leftovers.com

dehydrator